First thoughts on moving my blog from Jekyll & Github Pages to Micro.Blog

Spent a little time looking at how I can get my historical posts and photos migrated to Mb. If I’m going to go all in then it’s important that I can keep everything in one place. This Mb help post shows how it’s possible to upload markdown files, which is good news (since this is how my current blog’s post are stored) along with what front matter is supported in Microblog (which is Hugo behind the scenes). 

Few take aways..

I’m going to lose my tags. This probably isn’t the end of the world as actually most of my tags should probably be categories anyway. Most of my posts have many tags as the original idea was to help identify any relevant posts on any number of topics. Some basic testing shows that if I try and import a post with several tags as-is then it is processed and shown in Mb as one long category (see image below), this is probably because I just use spaces rather than commas to separate tags, which works fine in Jekyll. Nothing major in the blog relies on tags, there’s a few links, particularly the country page of my blog, which directs to a page with all any posts tagged with that country, but I can restructure that and achieve the same result with Categories. So in the below example, I will remove all tags except Finland. I could keep all tags but I will end up with hundreds and hundreds of categories. 

tags after import

Re-tagging/categorising will help clear things up a bit too, although there’s going to be some element of manual work. Hopefully it’ll help me reduce the number of categories I use to keep things simple. 

Another piece of front matter I use is ‘redirect_from’ which I setup because the slugs from my old blog don’t correspond to the Jekyll blog. I can live without these, they're not particularly important. I don’t have any logs from Github pages so I don’t know how much they’re used, but I’m guessing they’re basically not used at all anyway. 

I’ll also lose two custom fields I setup, one called ‘history’ which I used to indicate the date of the activity within a post in addition to the publish date, since the two can differ quite a lot. Along with ‘location’ which I intended to indicate where the post is relevant to. Neither is linked in any way. Location I ended up using quite widely, history isn’t used anywhere at all really. The below post about my trip to Belgrade shows both in action.

belgarde-frontmatter

Another observation is that for images to upload to Mb I need to format them to be absolute URLs, which they are not at present. This should be relatively easy, I just need to run a find and replace for '/assets/' with ‘[andrews.io/assets/'](https://andrews.io/assets/') and we’re good to go. I only use assets for images, so that’s easy. 

Unfortunately many of my posts have the main image as front matter rather than in the body of the post, see below example. This doesn’t see to import right, so I will need to link the first image where this is the case in the body for it to upload properly. 

Another link issue is that there is a fair amount of cross-linking between posts, see the example below. I’m going to need to give this some thought as the uploaded post in Mb takes on a complete new slug format (e.g. micro.andrews.io/2018/11/13/helsinki.html). Keeping these links working isn’t the end of the world, but there is a reason many of them are there. I think I might have to just upload everything, then export a list of these links and go and manually correct them with the correct slugs in Mb. Eventually I’m going to want to move Mb from micro.andrews.io to be andrews.io and so that needs more thinking still. Ugh. 

image-format

Last, I really quite like my Archive format. I would love to be able to have an archive page which lists ‘titled’ posts in a similar way in Mb. I use the Archive a lot to look back and quickly reflect on some of the things I did each year based on the title. Maybe this is possible, it’s a bit beyond my knowledge at present. Perhaps I have a category named ‘Important’ or something that then lists these. 
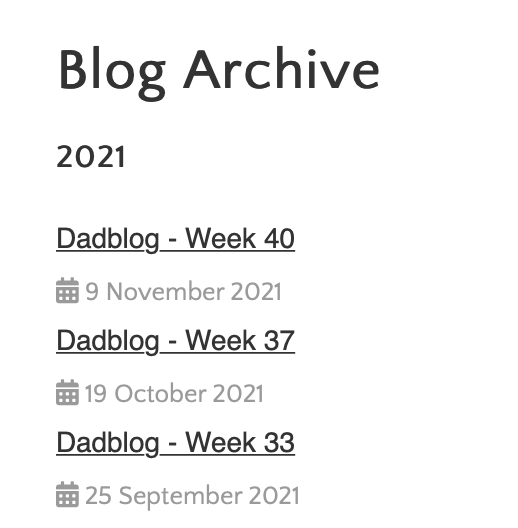
archive-format

Of course… Design is another topic completely, but one which isn’t at the top of the list. If I can get everything migrated properly I know I can change the design as and when. 

48Hrs of Starlink - Update

Since installing Dishy in the back garden on Friday things have improved really quite a lot. While I was really surprised how quickly we were up and running after installing, there were enough drops and packet loss out of the box for it to be a problem when streaming. After about 12 hours it was possible to see the obstructions visualisation in the App and this showed some slight obstructions to the west, which I think was probably our conservatory. I moved Dishy about a foot and a half to the East and that seems to have solved it, there’s now no warnings of obstructions or any red shown in the visualisation. 

Still a bit baffled that the service actually works just sitting on the ground in our garden, but if there was an optimal direction to point, North would be it! In the long term, it of course wouldn’t be ideal to leave Dishy in the middle of the garden - cutting the grass and people walking in front of it would be a problem. But I’m pleased it is working well and it is helpful to know which direction it homes for if we were to install permanently. 

The packet loss and drops have all but gone away now and the service is super stable. It’s not absolutely perfect, there’s the odd ping that goes astray, but very infrequent. Latency remains about 37ms to 1.1.1.1 or 8.8.8.8 which is good. As with latency, Jitter is obviously a bit of a casualty given the type of service Starlink is and varies between 15ms to 45ms. On my VDSL service Jitter is rarely more than 10ms. In practice and given our use, this is not exactly a big deal. 

Speed is of course the improvement that we notice most, in almost every speed test it exceeds 200Mbps down and 15Mbps up. Sometimes reaching 300Mbps down and 45Mbs up. This is of course really good, especially considering what is actually happening to make that possible. It’s not perfect mind and because of the latency it can take time for a download to reach the highest speed and even then it can be quite variable. Cloudflare Speedtest is good at demonstrating this, it has really useful candlestick graphics. Y’all need to stop using Speediest.net already. 

Would be very interested to understand if there’s any wan-op style black magic voodoo happening to help with the statistics and user-impression of the service. This used to be quite common with older satellite services because of the extreme latency. I don’t really think there is though, you can operate the service without the provided router (just using Dishy) and Dishy doesn’t have any major processing built-in (see teardown). And to do that kind of magic you'd need equipment and both ends. Having worked a lot with SilverPeak a few years back, I would love to have been able to run some optimisation over Starlink to see how much it can improve TCP connections. 

On the LAN-side of Starlink I have connected the ‘AUX’ (which is really just a LAN port) of the Starlink router to my home LAN. This has allowed me to us my Ubiquiti UAP-AC-Pro Wireless APs which provide much better coverage of our house and to connect everything. It’s not possible to configure anything on the Starlink router, but luckily it uses the same IP configuration as my VDSL router, so I simply swapped them out. The AC-Pro APs can’t quite use all of the speed provided by Starlink so I may have to move to WiFi6 at some point. Connected to Ethernet, it’s obviously really good. I used to rely on my ISPs usage monitoring but no such thing exists with Starlink so I’ve thrown my EdgeRouter X in between the Starlink router and the LAN as a managed switch. This reports to LibreNMS which I have had running on a Raspberry Pi for a couple of years, not great, but will do for now. 

Before the 30 days return window is up I think it will probably make sense to try and run dishy from my Dad’s who also lives in High Halstow, just to make sure service will work there when we move. I’m pretty sure it will because it’s possible to order a service, but won’t hurt to try. We still don’t have a move date, which means it’s now likely to be 2022. Mounting dishy on the new house isn’t going to be particularly easy, the back of the house is south facing - sure it’s possible with some creativity. I need to arrange for a local TV/aerial guy to come and install a Sky dish properly anyway, so makes sense to do both at the same time. Of course, need to commit to actually having it in the new house.. VDSL there should be about 60Mbps down which is a big improvement to here… I may see how we go without a broadband connection at all in the new house to begin with, we’d obviously need to commit to a contract. 

That’s all for now… Very happy so far. It really is very impressive and the geek in me is excited at being able to use what is undoubtedly going to be a game-changer for global internet connectivity, especially in remote locations. 

Getting Ready for the Big Day! (MacBook Pro Arrival)

So the MacBook Pro is still due for delivery tomorrow, tracking hasn’t updated at all over the weekend except to indicate it’s left Tamworth. Not having it arrive this weekend is probably a good thing because it’s allowed me to do some housework on file storage… (which I’ve been putting off for ages).

Since it’s been so long, I’m going to aim for a complete fresh start on the new Mac. Which I know is going to irritate me for a while, but hopefully it won’t take too long to get back to how I like things.

Right now, I’ve got everything organised as follows…

Where Things Live

Trying to keep this as simple as possible, my current MacBook Pro has 500GB of SSD which at the moment isn’t too much of a problem. It will be at some point soon, because my Photo library consumes 50% of that, baby photos will cause that to climb rapidly! New MacBook Pro has 1TB onboard, which should hopefully, just about cover growth for the next three years. I would have loved to have gone for the 2TB option, but it was an extra £400 😱!!

Local Machine

  • Almost everything now lives in iCloud Drive. That’s Desktop, Documents, Screenshots, Scans, Projects, etc. ‘Optimise Storage’ is off.
  • Apple Photo library is stored locally, and enabled for iCloud.
  • Photos/Images not in the library live in iCloud Drive as files (commonly files I’ve exported from Photo Library anyway)
  • Downloads are stored locally, I don’t back these up and consider them expendable.
  • Don’t really have any Music, the music I do have lives in iCloud as files.
  • Email is stored locally (and with FastMail)
  • Don’t have any movies.

External SSD

I have a 500Gb Samsung T7 SSD, which was a really good investment earlier this year to help migrate from Google Photos. It’s encrypted and now takes care of two things:

  • Large video media, typically videos from my DJI Osmo, Drone, GoPro, etc. Ordered in directories by month so I can try and avoid duplicates. Essentially, everything I don’t want in Photo Library.
  • Old documents/data which I don’t need in my life any more or don’t want to sort out.

GitHub

Of course, Blog (posts, site and images) lives in GitHub, copies of the repo are also on my iPhone (via Working Copy) and Mac. Same for other miscellaneous projects.

Backups

My goal is to follow Backblaze’s 3–2–1 Backup Strategy and have two local copies of everything, one on my machine, another on a separate drive plus another stored off site. Important to remember that iCloud provides synchronisation convenience but is not a backup method. I want to be able to know that if I lose my Mac, I don’t lose anything. And if I were to lose my Mac and my local storage, I don’t lose anything. Same for if the cloud provider looses my stuff.

BackBlaze

Surprise! I use Backblaze. I don’t love it, but actually it works fine for essentially everything I need it to do. With the amount of data I have, I feel that it’s pretty expensive, but it’s worth it for the convenience. I have it setup to back up everything on my Mac, including iCloud Drive data (which needs to be kept local). It excludes certain things, but nothing I consider of value.

With the new Mac, I’ll set the External SSD to backup too, so that’s all that data is off site. I’ve been putting off seeding that drive until I’ve had a tidy-up because it is going to take absolutely ages to upload. I will need to make sure to keep the drive connected as much as possible when at home too, perhaps an iOS shortcut can help remind me. I also plan to subscribe to Extended Version History, hopefully this will help cover me should I forget to connect it one month, although I don’t quite know for sure…

Time Machine

Of course, can’t go wrong with Apple TimeMachine. I have a crappy, slow 1TB disk that I use for backing up. I have a long USB-C cable that goes under my desk because it’s incessant spinning and clicking drives me crazy. This serves as my local backup of everything on my Mac.

What’s missing?

I need to have a secondary local copy of the External SSD. I think the answer to this is to have a slave device that I periodically synchronise from the master. I’ve been holding off because the 500Gb drive is almost full and if I upgrade I want to upgrade as a pair, ideally to 2TB rather than 1TB. I have debated buying the SanDisk Extreme Pro, which has a Read-Write speed of 2000MB Per Second, which is twice as fast as the Samsung T7. The 1TB version is £150, which actually isn’t too bad, the 2TB is obviously more. However, if I do buy a pair, the slave device could be slower since I’d run the sync overnight.. I think I’m going to collect a LOT of video over the next few years once the baby is here.

Alternative and probably a more sensible option is a Synology NAS, but with the spec I want, it’s just shy of £1,000 which is a fair wedge of cash. I would probably go with the DS720+. I expect the The Read-Write speed of a NAS even if it’s tricked out is going to be WAAAY slower than the external drives and that I suspect would really annoy me. Maybe something for when I get sick of external SSDs. It would also need its own Backblaze B2, which adds further cost. Advantage is that it could work with CCTV should we want it for the new house. Another pet-project is to combine the (4!) separate raspberry Pi devices to a set of NUC (or similar) devices and run VMs on a proper hypervisor. The NAS would be ideal for providing shared storage. This is a project for another day…

The local TimeMachine drive needs replacing too. I want to go SSD so I don’t have to listen to the clicking. Perhaps it’ll be faster too, because right now, it’s crazy slow.

I am debating re-signing up to Backblaze with a new account so that I can set my storage location to EU, rather than US. This is only possible at sign up by changing the tiniest most non-obvious option at sign-up. Seriously Backblaze, buy some DCI bandwidth!

Also, I need to do better with random SD-Cards. I have a terrible habit of leaving stuff on them and not knowing if I’ve transferred it off already. Then I end up just dumping everything on my Mac when I need an empty SD-Card.

Blogging with Jekyll

Moving my blog to use Jekyll and GitHub Pages was a really good move, it’s a great setup and it makes me happy that my precious blog is stored locally, is super simple but hosted properly too. It used to really stress me out that I might one day lose everything. The fact that it has version control as a result is a bonus too.

I have some frustrations with the setup, but some of these applied even when I was shelling out for Squarespace:

  1. Managing images for upload. This is a pain, I have to first find the images I want in Apple Photos, I then have to export them from Apple Photos, although granted some of this process works quite well because I can resize them, set them to be jpeg and add to the correct directory. Annoyingly though while I have the option to name based on album name Apple adds “1 of 1” rather than just “1” so I have to go and rename them, i remove the spaces here anyway. I don’t like having any EXIF data in the photos so I then have to run exiftool from terminal to strip everything. Not the worst process, but not the simplest. Perhaps some of this could be improved with Automator or another tool. The other frustrating part is that I have essentially just fixed the image size, which isn’t really ideal for web hosting. I’d rather publish the full resolution image and some other function figure out the optimum size/scale to deliver in the browser.

  2. Posting. I’m using Atom, which is a pretty good app. I have two frustrations with it, the first is that I can’t put posts into folders within the “_posts” folder because it breaks Jekyll, the result is that I have an enormous long list of posts in the left pane of Atom. Maybe this is something that can be changed in Jekyll’s code. The second is that I want to be able to just post, I don’t want to have to stage, commit, and push. I want one button. Maybe there is a way to be ignorant of Git’s process or even a simple script that I run that does those three things. The answer here is probably just to use a CMS tool like Forestry or Siteleaf, it’s just a little frustrating that they are both web apps rather than a local Mac app.

  3. Image Galleries. I have lots of pictures on the blog but I can’t see any of these unless I actually read the post where they are shared. I want a page that automatically updates with my most recent images, formatted in a consistent way (much like gallery of Micro.blog) which link back to the post where the image was shared. I’d also love a way to share photos in albums on a page, where a particular trip has lots of pictures and perhaps I didn’t add all the pictures into the post. I think this plugin by ggreer should do what I’m thinking, but I need to invest some time in making it work right.

In short, why can’t everything just work the way I want for my very specific use case?

Mandatory Leave

The COVID situation last year meant that we really didn’t get to go away as much as we usually would have and as a result I had lots of annual leave left. Colliers permitted the carry-over of five days leave to 2021 on the condition it is taken before the end of March. With the current national lockdown we aren’t going to be using those days to go away. So, I plucked a week out of thin air and booked it off…

It’s actually been quite refreshing to have a week off with no rush to do anything in particular or with a set agenda. I can’t say I love it, I much prefer the hustle and bustle of a full calendar, but that’s not an option. In my week off I have managed to get quite a few things done that needed to be done.

In the house I put up some new blinds in the conservatory. When we moved in there were some vertical blinds installed which were not great, so we took them down. We have lived with no blinds for a while now, but it’s a bit annoying having to close the lounge curtains when it gets dark outside. The new blinds were only cheap, £25 quid each from Dunelm and do the job, the all needed to be adjusted to the right width which took about an hour and a half per blind since they were “not adjustable”. I also had to install some spacer blocks so that they didn’t catch on the window handles. After having installed them I am really quite happy with them, certainly £100 happy, it feels a bit warmer in the conservatory and the neighbours can no longer see me rowing either. We installed “party mode” for the conservatory too, with 10 meters of cheap LED lights which I ran around the inside edge between the window and the roof. I was surprised, the lights are actually really fun, although I have no idea what the neighbours must think - from the outside it looks a bit like a shady nightclub. They will be really good for parties when we’re all allowed to see each other again.

With that all done I also had a bit of a digital cleanse. I have been using Google Apps/G-Suite since about 2012, I moved from the personal Gmail service to GSuite because it enabled me to use my own domain name. This was great for a while, it gave me a few different capabilities and everything played well, I could have any number of email aliases and victoria had an account too. More recently, it’s become a bit of a pain.. Aside from having to pay for it every month, it has grown into a very enterprise-focused platform rather than a bit of a workaround that let me use my own domain name. Since moving from Google/Android to Apple/iOS I have also slowly realised that Google isn’t the right cloud for all my things to live, while things work they just don’t integrate as well. Photos was the big one, the Apple Photos app is just better if you’re in the ecosystem. Mail, Document Storage and Calendars were less important, they all worked but not quite as well as things could work. This week I have been chipping away at getting my precious data out of Google closing G-Suite.

Moving email was relatively easy, I signed us up for Fastmail and shifted the domain/s over. I debated moving all the email data out of Google and into Fastmail but in the end just moved everything to a local mailbox on my Mac. There it’s backed up it’s not just taking up cloud storage and it’s going to be a hell of a job to filter genuine email from marketing spam. One of the benefits of the COVID situation is that I have no reservations or emails that I might need while I’m out and about, so that’s kind of convenient to have a fresh start. To get mail working I changed the default mail app on devices and deleted all the email that was left in Google. The setup process from Fastmail is really good, it sets up the profile and does everything for you.

Calendars was pretty easy too, we have two shared calendars in Google, one for Events and another for Birthdays & Anniversaries. These I simply exported, added to the native mac app and merged. Apple has a calendar for anyone in a ‘Family’ already, and I just added another for the birthdays calendar and shared. Again, just , I had to adjust the default calendar app on devices too. I really like the native calendar app, I probably should have synchronised Google with it a while back, but hey! I know that if you add a birthday into Contacts it also adds it to the calendar, but these aren’t shared so we’d have to both manage everything.

Getting documents out of Google was a bit more tricky. It seems that when you initiate Google Takeout and instruct the export of everything in Google Drive it includes all of my photos too, as Google used to present these as a folder (and still do, although it doesn’t update). The folder isn’t displayed as something that you can unselect but selecting everything else seems to exclude it. Downloading the takeout files is a complete PITA on my internet connection, the files just seem to timeout and fail but once they are down it’s fine. Helpfully Google converts files from their format into Microsoft and those files that I used to use frequently still seem to work. I haven’t yet deleted all of these and am particularly curious if it will let you delete the Google Photos folder, once I have everything backed up I will be deleting everything here.

The one Google service I completely overlooked was YouTube which I will still need to use. I don’t have many YouTube videos but I do have some, erasing them from the internet would be a little frustrating. What I managed to do in the end was to move my channel to a new brand channel called ‘Laurence Andrews YouTube’. This moved all of my videos and subscriptions into a separate channel but retained comments/likes and permalinks. I then created a new personal google account (google@andrews.io) and added this new account as an owner of the new brand channel. This seems to have worked quite nicely, I am signed out of my G-Suite account and still have access to all my content and surprisingly still have my subscriptions too. The final thing to do is to make the new personal google account the primary owner of the new brand channel, this can only be done once it’s been an owner for 7 days, which seems to be a safeguard Google have implemented. Of course, I will still need to have a google account, but there’s not much I can do about that and at the end of the day, it’s going to be difficult to live without YouTube! Here’s a link to moving channels

Moving Photos has been a whole thing, I have shared a blog about the process I used to export from Google and ingest into Apple. Fair to say that this was one of the most painful things I’ve done in a long time. Good news is that I am almost there, Apple now has essentially all of my pictures and once I go through the few that are remaining it’ll all be in one place. This makes me very happy. I look forward to some product improvements with Apple Photos, it’s absolutely better but it’s crying out for better integration into the “Family” functions within Apple. I can share Albums with Victoria but I can’t make that the default for most things, which I’d prefer. The lack of Folder management for Shared albums is annoying too. Another function that would be really helpful is to store a full copy of my library on an external drive but an iCloud optimised library on my local storage. This isn’t a problem yet, but will be if the album grows much more. Certainly a consideration when buying a new mac too, as the internal storage needs to be able to manage the full library.

Aside from the Google shift I have signed up to Backblaze in addition to managing TimeMachine for backups. I’ve been putting this off because of the cost, I have so many subscriptions to services I just couldn’t justify another one but with Google about to go away and save £17 a month (1TB storage + 2 G Suite licences) it makes sense to sign up and cover ourselves. Backblaze has been doing it’s thing on both mine and Victoria’s computers for the last three days, our piddly 6Mbps upload is frustrating for things like this. Still, I think we should almost be there by this time next week. To help it along I spent a good while going through my mac and deleting a load of stuff that I don’t need any more (I have a crazy amount of screenshots and screen recordings stored) and got rid of all the one time applications I installed and no longer need - including Chrome! I did the same on my iPhone too, no more Google things there any more.

All in all, a busy week or so but happy that there is some order in my digital life. :) Now, back to work.

Software, etc

I saw someone else do one of these posts recently and thought it was a really good idea, so here’s me ripping off that idea… 😈 This post is basically a list of technology-related services/software that I pay for, some of them are fantastic some of them are less good.

You Need a Budget

I don’t know how I would live without this software, in fact, I do know - with less money. YNAB is a personal budgeting app, it tracks where you want to spend your money and helps drive a mindset away from ‘paycheque-to-paycheque’ living (Where you determine if you can afford something based on the money in your account). It is different from most ‘money management’ tools because it’s primary purpose is budgeting, not reporting- although the reporting is fantastic. Victoria and I have saved more money and paid off more debt that I could ever have believed possible. If you don’t feel like you have a tight handle on your money, get YNAB going, it’ll save you and don’t be put off at the price, it’ll pay for itself over and over again. YNAB is $83.99 a year (I don’t know why they don’t do localised pricing…🙄). Here’s my referral link

Sync for YNAB

By default YNAB doesn’t support automatic import of transactions from UK debit/credit accounts. This solves that by using Truelayer or other systems to get data out of these accounts and in to YNAB. As a couple, we have a lot of transactions, manually entering these into YNAB constantly is a pain in the ass, this solves that and everything works beautifully. If you’re new to YNAB, you’re best off manually entering to start with as you should be checking you have money in your budget before you commit to the transaction. Once you know your budgets well, you can let the automation take over. I signed up early in the launch of the service and pay £2.49 a month, which is very reasonable.

Bear Pro

A long time ago I used to use Evernote, well, everyone did, at the time it was fantastic. But the thing with taking notes is that you either want to do it quickly (and not open up a whole massive application), or you want to brainstorm and think (and don’t want to be distracted) and Evernote wasn’t very good for either of those things. When I switched to using an iPhone and Mac on a daily basis one of the first things I did was move to Bear. It’s simple, clean, well designed and supports all of my devices. I can search, store things in markdown, tag and even stack tags. It’s perfect, I love it and I hope it doesn’t change.

Todoist

I have a love hate relationship with Todoist. When I’m really busy and managing lots of things at the same time, Todoist is an absolute saviour, I can figure out what I need to do first before I just do the thing I want to do. However, when I’m less busy I don’t get the value from having to manage Todoist and find it easier to just use a notepad. Great software though and very happy to pay for it, even if I don’t necessarily use it all the time. There’s no question that it’s the best todo list application available.

Micro.blog

This is the newest contender to the list. I recently discovered micro.blog which is basically a middle ground between a full-on blog post (such as this) and a tweet. My blog is hosted on Github Pages and I normally use Atom to publish posts, which is fine, but it’s only really possible to do so from my Mac and to do so take a little while. Micro.blog allows me to quickly post quick thoughts and images using an App on my phone or Mac without all the hassle of Atom, I’ve not tested it when travelling yet, but my hope is that it’ll work really well. Plus, although it’s separate to my blog, I can keep access to the content and even have micro.blog send it to a GitHub repo. Oh, and it’ll post everything to twitter automatically - easy. I have subscribed (but not yet started paying), it’s $5 a month which seems very fair.

1Password

Switched from Dashlane a year or so ago after being suckered in by Dashlane’s product design. In the time I was a subscriber I felt like there was zero product development while Lastpass and 1Password were jumping ahead. The interaction Dashlane has (had?) with the autocomplete in a browser was VERY annoying, to the extent that I simply didn’t use the browser extensions. Moving to 1Password was a great decision, the product just works better. I ran both side by side for almost a year while I moved everything over (which was a complete PITA). I especially love the 2FA integration with 1Password, although I believe Dashlane has that too now. 1Password basically does everything I could ask of a password manager and it works very well via the browser extension, doing a good job of knowing what thing I want (new password, password update, etc) at the right time. We have a family account, so we can share certain passwords, etc, it costs $71.82 a year.

Toothfairy

This is just a cute little app, it helps connect/disconnect bluetooth devices quickly on Mac. Saves time going into the bluetooth menu and also shows a customisable items on the task bar with battery status. I use it mostly to determine whether my AirPods are connected to my Macbook. It does work with Big Sur, but I van’t confess to having used it quite as much as I did on Catalina. No idea how much I paid, not a lot.

Gemini2

This is an absolutely genius app. You can point Gemini2 at a directory and it will find duplicated or similar files, simple. This is particularly useful for folders of photographs which contain lots of similar photographs - I have a terrible habit of taking a bunch of pictures of the same thing and this helps contain my ever expanding photo library. I recently moved all of my photos from Google to Apple and I ran Gemini2 over all of the photos I moved. I can’t quite remember how much storage I saved, but it was pretty considerable, and of course I have a cleaner photo library too. The website looks shady AF, but the software is the real deal.

DayOne

I desperately want to routinely journal, but really struggle to do so. I’ve used DayOne on and off for a number of years now but still don’t have a LOT of content in there, but I do have some. I absolutely love being able to read back on old journal entries and see what I was doing on that particular day. The real value with DayOne is that the journals are obviously private and so unlike a blog you can share thoughts and feelings in a way that you wouldn’t in a public blog post. Those thoughts and feelings are REALLY amazing to read back after time has passed, they capture a level of detail that you will have forgotten about. I pay for DayOne, it’s really expensive, but even if I capture a few fleeting thoughts here and there, it’s worth it.

Amazon Web Services

A long time ago I used to do all my backups to AWS using some funky desktop tool, now I’m sensible and let the app developers interact directly with AWS. I still have a few other bits and pieced in AWS, but not a lot. I use Route 53 for hosting my public DNS zone files, I do so because I prefer that they’re separate from the registrar and I’d hope that they are relatively safe in AWS. I also host some static content using S3, mostly images, PDFs. Together this costs next to nothing, although Route53 isn’t the cheapest.

Google Workspace

Want to use a custom domain for all your google services? You need Google Apps, also known as G Suite and now known as Workspace. This made sense a while back, for a small fee you got a bunch of controls and benefits. It’s now morphed into a fully fledged thing and it’s becoming more and more of a pain to look after. I plan on migrating everything out of Google, (I’ve already extricated photos) and instead using iCloud and Fastmail. Very much on the roadmap, a job for another day.

Moving from Google Photos to Apple Photos

A while back I moved all my photos from Google Photos to Apple Photos. It was a massive pain, because Google Takeout doesn’t give you your photos in a very sensible way. If you have custom albums, photos are exported in the ‘date’ directories and then also exported in the ‘custom’ album directories - so you either need to ignore the custom albums or check for duplicates. Also, some files will retain their exif data (date/time, GPS, etc) but not all, those that don’t google will have moved it to a .json file of the same name - which Apple doesn’t read. I also found a bunch of files that where the exif data was just broken but could be repaired.

Here’s a very simple overview of the steps that I took, to get my pictures into Apple. I’ve omitted some of the obvious steps, so engage brain before following this. All commands were run on my mac, locally - If you’re using Apple photos and you’re not on a Mac, you’re going to have a bad time.

The first step is of course to actually get your data out of Google, you can ask for it in whatever size files you want. I picked 10Gb and so over a period of time downloaded each one. If you have a lot of photos/videos in Google then you’re going to need to manage your storage on your mac carefully. Ideally, you want to run these commands and manage the import of files while they are located on the on-board SSD storage (unless you have a fast SSD external drive), running these commands while the files are on a slow disk drive will take a long-ass-time, but is certainly possible.

Once you’ve got your files downloaded and stored, extract everything. I found storing in folders by year worked best so I could manage the import in batches. Go ahead and do some folder house keeping to get that ready. If you see there are folders with friendly album names my experience shows that the files in here will also be in the dated folders too, so worry about the dated folders for the time being. You can always check back later and make sure you’ve got everything.

When you’re ready to tackle your first batch, you can optionally choose to get rid of any edited images and duplicates. I had very few edited images, and those that I did have, weren’t edited very well or were an artefact of Google’s self-editing processes.

Delete all edited images to reduce duplicates.

The below command is quite aggressive, it’ll delete anything with ‘edited’ in the name. Once that’s complete I use a software package called Gemini2 to check for duplicated files in the directory, this is a fantastic tool and not only does it check for exact duplicates it also checks for similar pictures. You can review these or delete them, I was aggressive and just deleted anything that was similar. It’s best to run Gemini2 now, as you can run it against a specific directory, once you’ve imported to Apple Photos you can only run it against your whole library. If you run it now, you’re also going to avoid Apple uploading potential duplicates to iCloud.

find ./ -name “*edited*” -type f -delete

You can then run the Gemini2 app against your directory.

List number of file types per extension

This command will simply list the number of files and file types in each directory. If you have a lot of movie files, you can optionally move these elsewhere to speed up processing and help manage disk space - I did this, because I had tons of crappy videos. Take a note of the this output for later, it’s helpful to just keep tabs on how many files you’re processing.

find . -type f | perl -ne 'print $1 if m/\.([^.\/]+)$/' | sort | uniq -c | sort -n

Check which files are missing data or are damaged

This command which you should run in the directory of your files will recursively check through the directory and add a line in a CSV with the date/time fields from the exif data of the image (not from the json) and the filename. It’s set to ignore the DS_Store and json files so that they don’t show up in the CSV. You could instead specify the image file types, although I found I had a bunch of random file types which were all images.

exiftool -DateTimeOriginal --ext json --ext DS_Store -r -csv ./ > out.csv

Once you’ve done that you can read the CSV and see how many files are broken and how many have got the right information. I found that about 10% of my images were broken.

Filter Broken Images

I used the sort functions in Excel to list only those files which didn’t have date/time populated. I then copied the list of course files and stored in a text file called missing. You can create the file using Vi or Nano (as below) and then simply paste from Excel and save. I stored this file in the root of the batch’s director alongside the CSV file (which you don’t need to save).

vi missing.txt

Prepare for Json shenanigans

The objective here is to repopulate the missing data for the broken files by extracting it from the file’s json file. Not every file will have a json file, but most should. First we need to get a list of the json files. The below command duplicates the file we just created.

cp missing.txt missingjson.txt

Once that’s done you can open the new file in Vi and using a snazzy command you can append .json to each line in the file.

vi missingjson.txt

Run this once you’re in Vi:

%s/$/.json/

Separate broken and non-broken files.

We’ll create a new directory called broken and move all of the files which we’ve identified as broken to it. Once done, we’ll also move all of the json files too. You’re going to see some errors here because not all of the files will have an associated json file. You can make a note if you want. Some files may have trailing spaces and they won’t move, so you can move these manually.

mkdir broken/
cat missing.txt | xargs -I % mv % broken/
cat missingjson.txt | xargs -I % mv % broken/

Now that we’ve done that we have a folder full of files that look like they’re missing data. We can then begin to repair the data or fix it using the below commands.

Repair the exif data in the files

This command is designed to fix corruption in exif data. You can read about it here, point 20b. We’re going to run this against all the files in the ‘broken’ directory. You’re going to see some errors here but I saw good success in it fixing exif for a number of files.

exiftool -all= -tagsfromfile @ -all:all -unsafe -icc_profile ./broken/

Fix GPS and Date

If that didn’t work, hopefully we can restore from the json file. This command will read the file’s json file and then restore to the files exif. It will overwrite the files when it does this. There are lots of fields in the json, I was only interested in data/time and GPS coordinates.

exiftool -r -d %s -tagsfromfile '%d/%F.json' '-GPSAltitude<GeoDataAltitude' '-GPSLatitude<GeoDataLatitude' '-GPSLatitudeRef<GeoDataLatitude' '-GPSLongitude<GeoDataLongitude' '-GPSLongitudeRef<GeoDataLongitude' '-DateTimeOriginal<PhotoTakenTimeTimestamp' -overwrite_original broken/

This won’t work for all files. But we’ve done our best at this point.

Check back over if you need.

You can use the earlier command to see how many files you’ve fixed the date for if you want, although you may be able to gauge from the CLI.

Import to Apple Photos

When I importing into Photos import all pictures directly into an album (e.g. year_imported), this allow you to create a separate smart album filter against your specific import batch. Once you’ve imported you can use a smart album to see any photos which have a captured date before or after my selected year. If you don’t import to an album, it’s not possible to filter on ‘recently imported’ in the same way (date added variable is limited to the last 1 day, so you can’t differentiate multiple imports on the same day)

Once done, you can select all images/videos with incorrect date and manually set the date to something within that year (e.g. 1/1/year) to avoid photos showing up in completely the wrong place. You can do this in apple by selecting all photos.

Repeat for each batch

This is a long winded process and is almost certainly not the most efficient way of doing this, but it seemed to work for me. Apologies if I haven’t attributed anyone for the commands, I did this about 9 months ago and wrote this based on the notes I took at the time. I do however remember trying to piece things together and certainly didn’t find a comprehensive guide on this.

If this helped, send me a tweet ✌️

So Long, Squarespace

Want to hear something frightening? Since I moved my blog to Squarespace I have given them $1,210 dollars. That is INSANE. It’s enough for a trip to NYC!

Time for a change and today I’m very pleased to welcome you to my new blog which as you may have noticed looks remarkably similar to the old blog. The key difference if that it no longer costs me $19.20 a month to host but it also now fully supports Markdown, can be updated and drafted locally and allows me to stay in control of my content.

I signed up for Sqaurespace in October 2014 after moving from Wordpress where I believe it was hosted on a small VPS server I was paying for. Here is what it looked like back then, not much but it was something. The hope by moving from Wordpress to Squarespace was that I would focus more on content creation than screwing around trying to keep Wordpress patched and secure. The additional cost of moving to Squarespace would also work as an incentive to actually write blogs more frequently too. It’s fair to say that mindset worked I’ve got a fair few posts in the collection, some which I love others which are just a snippet into the past. I’m confident that I’m invested enough in content creation and I cannot wait to write more this year so the ‘blog tax’ can stop.

The new blog is hosted on Github Pages which has become a bit of a go-to for hosting small websites, the combined integration with Github is very useful for tracking changes and over the past few weeks I’ve learnt a lot about how Github works. The site itself is built using Jekyll which is a static site generator, a process where the programme runs through all the content, templates, etc and outputs a flat html site. Github Pages has native support for Jekyll so all of that happens in the background so long as the raw content is uploaded correctly.

Jekyll can also run locally on my MacBook which allows me to store and draft all posts and changes locally before committing to GitHub. This feature would have been hugely helpful when Owen and I were on the #TrainToTurkey where connectivity to the internet was very patchy. Of course it was possible to draft in Markdown and then copy/paste to Squarespace but I then had to mess around with images when I had a connection, now I can do everything and just hit commit when I’m ready - easy!

The theme for the blog is a fork of a theme by LeNPaul called Lagrance which was pretty simple to interact with and very close to the theme I was using on Squarespace. I have adjusted a bunch of things in the CSS file but nothing major. I have added the jekyll-redirect-from plugin so I can keep my slugs working from the old site, I don’t know how much these are used but I know some of the posts reference other posts so this will save updating them. Another feature I added was some code and a script from Long Qian which allows me to keep tags working too, this is a very clever little setup that I’m a huge fan of!

Moving all of my posts has been a bit of a Christmas-break challenge, I’m about half way through and expect to have the remainder completed before Squarespace is finally switched off in late January. So far I have moved all of the posts from 2018 and 2019 most of which were very content rich. There was a resonable amount of manual effort to move things, but I was able to cheat a little by exporting an XML from Squarespace, importing that to a free Wordpress site. Once in Wordpress I was able to bulk-download the media and use a script I found online to convert the posts into Markdown. Once in Markdown format I just review each post manually and add tags, and correct the image URLs. Not too bad… The benefit is that I’ll have a nice clean content-set for the future.